
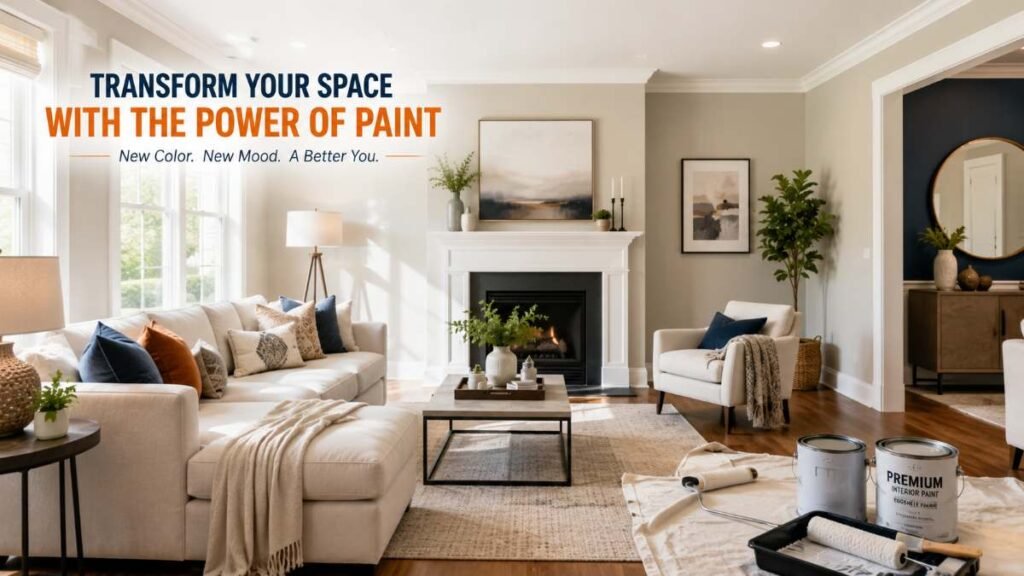
Have you ever stepped into a room and instantly felt your mood lift, simply because of how the afternoon light hit the walls? Most homeowners jump to expensive furniture or massive remodels when their space feels outdated. But honestly? Nothing transforms a home faster—or gives you a bigger bang for your buck—than professional-grade interior painting. Here’s how to skip the rookie DIY mistakes and unlock a high-end finish that lasts for years.
Why Proper Prep Work Defines a Professional Paint Job
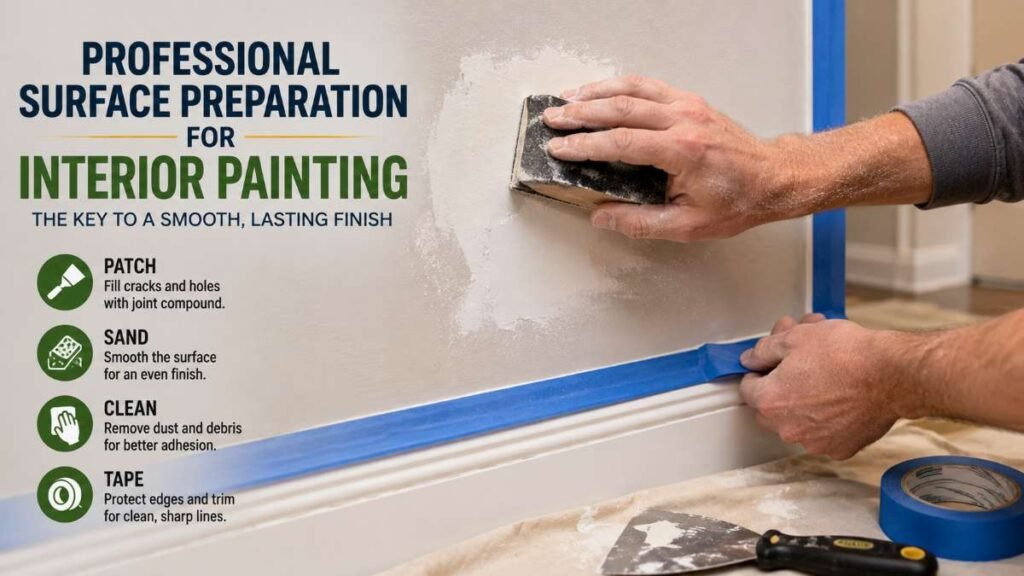
Let’s be honest: nobody buys a bucket of paint because they’re excited to patch drywall or spend three hours masking off baseboards. We want to see that satisfying transformation as the roller glides over the wall. But skipping these tedious prep steps is a guaranteed recipe for a sloppy, amateur-looking finish. The secret behind a flawless finish isn’t buying a $90 paint can; it’s the invisible prep work completed long before the paint lid comes off.
What Happens When You Skip Prep?
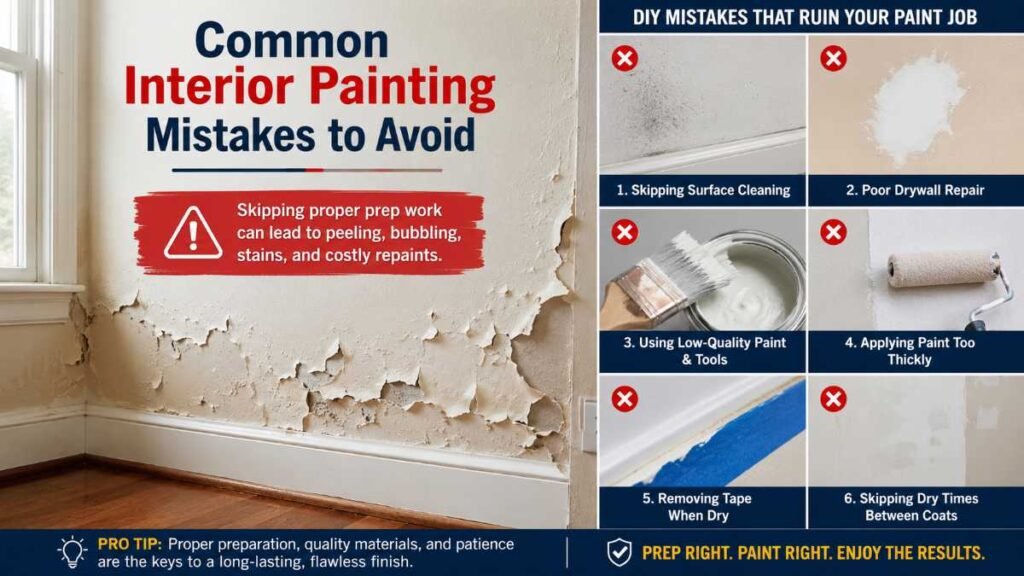
When you ignore underlying drywall issues, grease spots, or hairline cracks, your new paint layer acts as a magnifying glass rather than a cover-up.
- Peeling & Bubbling: Paint simply can’t bond to greasy or dusty drywall—it sticks to the layer of dirt instead. Give it a few months, and you’ll watch your expensive new paint start flaking off in sheets.
- Visible Ridges: Un-sanded patch spots reflect light differently than surrounding drywall, creating dull “flashing” spots under direct light.
- Bleed-Through Stains: Water marks, smoke residue, or ink will seep right through three coats of standard latex paint if you don’t seal them first.
Phase 1: Surface Scrubbing ➔ Wash away accumulated oils and grime.
Phase 2: Drywall Restoration ➔ Fill gauge marks, let cure, and buff even.
Phase 3: Particulate Sweeping ➔ Clear away chalky sanding residue.
Phase 4: Base Undercoating ➔ Apply stain-blocking primer barrier.
Phase 5: Perimeter Isolation ➔ Precision-tape trim lines and caulk seams.
Real Experience Note: During a past renovation in an older 1980s home, I tried saving time by rolling premium paint straight over grease-stained kitchen walls without washing or priming them first. Within four months, the paint started bubbling near the stove area. I had to scrape off the peeled layers, sand it back down to bare drywall, apply a shellac-based primer, and repaint. That simple “shortcut” ended up costing me three extra days of manual labor.
Professional painting crews spend upwards of 60% to 70% of their project schedule on preparation—washing baseboards, filling nail holes, sanding patch compound smooth, and caulking gaps along trim.
Choosing the Right Sheen: A Functional Guide
Selecting your paint sheen is just as critical to the final aesthetic as picking the color swatch itself. If you’ve ever painted a high-traffic hallway with flat paint, you probably know the frustration of watching a simple scuff mark turn into a permanent smudge when you try to wipe it clean. On the flip side, slathering high-gloss paint across uneven bedroom drywall highlights every minor tape joint and dent in the wall.
Paint Sheen Selection & Application Matrix
Paint Sheen Finish | Durability & Cleanability | Light Reflection Level | Best Recommended Rooms | Typical Ideal Uses |
Flat / Matte | Low (Wiping causes shine) | Absorbs Light (0-5%) | Ceilings, Low-Traffic Bedrooms | Concealing uneven drywall patches |
Eggshell | Moderate (Handles light wiping) | Low Luster (10-25%) | Living Rooms, Dining Areas, Dens | High-volume gathering spaces |
Satin | High (Wipes clean easily) | Soft Pearl Luster (25-35%) | Hallways, Kid’s Rooms, Foyers | High-traffic, active family zones |
Semi-Gloss | Very High (Moisture Resistant) | Medium Luster (35-60%) | Kitchens, Bathrooms, Trim Work | Cabinets, baseboards, high humidity |
High Gloss | Maximum (Scrubbable) | High Reflection (70%+) | Doors, Custom Molding, Metal | Architectural features & cabinetry |
Breakdown of Primary Sheen Options
Flat and Matte Finishes
Best reserved for ceilings and quiet bedrooms where light diffusion matters most. Matte finishes absorb ambient light, concealing minor surface flaws and creating a velvety look. However, avoid using flat finishes in tight hallways or children’s play areas, as scrub stains will leave polished patches.
Eggshell and Satin Finishes
The industry standard for residential interior painting. They offer a subtle, elegant sheen that handles routine cleaning without stripping the paint layer. They sit right in the sweet spot for living rooms, offices, and master bedrooms.
Semi-Gloss and Gloss Finishes
Highly moisture-resistant and durable. These finishes are ideal for baseboards, crown molding, kitchen cabinets, and bathroom walls prone to steam and condensation.
If you are planning broader kitchen improvements alongside your walls, check out our detailed guide on How to Paint Kitchen Cabinets to choose the right enamel finishes that resist heavy daily wear.
Color Psychology: How Shades Shape Daily Mood and Focus
The colors surrounding you every day do more than just look nice—they influence your energy levels, mental focus, and emotional well-being throughout the day.
Understanding Light Direction & Color Temperature
Before buying gallon buckets of paint, tape up large paper paint swatches and observe how your candidate colors shift under both natural sunlight and evening lamps:
- North-Facing Rooms: Receive cool, slightly bluish natural light. Crisp whites can feel cold or clinical here. Warm neutrals, creamy ivories, or blush tones help counteract shadow undertones.
- South-Facing Rooms: These spaces soak up intense natural daylight from morning to evening, making them versatile enough to handle darker, bolder paint colors without feeling gloomy. These spaces easily handle deep charcoal, moody blue-grays, or cool sage greens without feeling dark or overwhelming.
- East-Facing Rooms: Warm light in the morning, followed by cooler afternoon shadows. Earthy ochres and soft tans maintain balance throughout the day.
- West-Facing Rooms: Cool in the morning, but hit with hot, golden light late in the afternoon. Muted neutrals stop the space from feeling uncomfortably intense at sunset.
If you’re pairing fresh wall colors with structural kitchen updates or layout redesigns, exploring these Small Kitchen Island Ideas & Space Saving Hacks can help keep your cooking area open and light-reflective.
Essential Tools and Equipment for a Flawless Application
Trying to paint a room with cheap store-bought rollers and loose brushes is a recipe for frustration. You’ll end up picking stray bristles out of wet paint and dealing with streaky roller marks. Investing in quality gear makes the application process faster, cleaner, and much more satisfying.
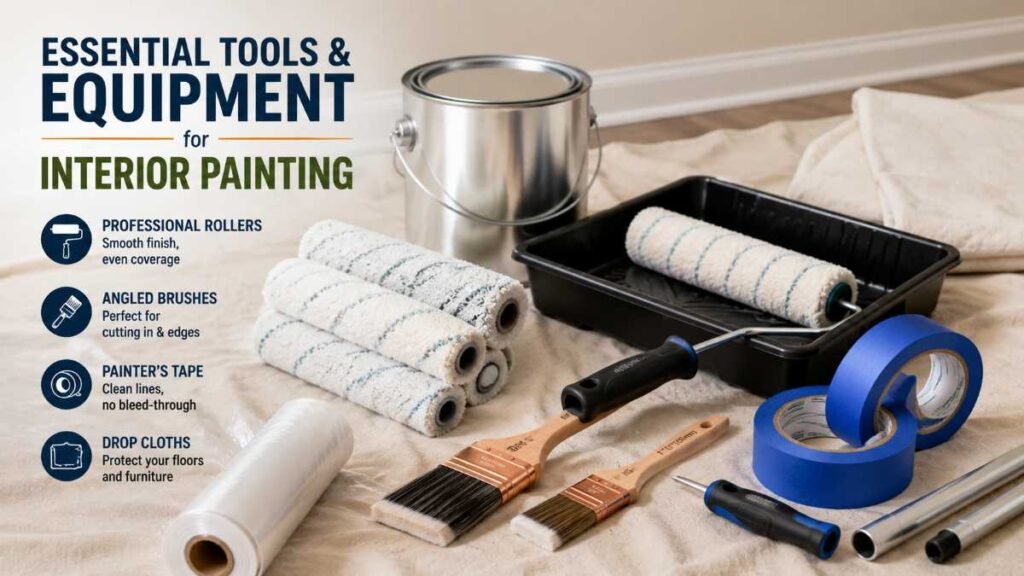
Professional Gear Checklist
- Angled Synthetic Bristle Brushes: A quality 2.5-inch nylon/polyester sash brush holds more paint and gives you precise control when cutting-in along ceiling lines and door frames.
- High-Density Microfiber Rollers: Microfiber roller covers carry paint evenly without dripping or throwing spatter across the floor. Match the nap height to your wall surface—use 3/8-inch nap for smooth drywall, and 1/2-inch nap for light texture.
- Heavy-Duty Canvas Drop Cloths: Cheap plastic sheets slide around, tear easily, and track wet paint around the house. Thick canvas absorbs accidental drips and stays securely in place.
- Adjustable Extension Pole: Hooking your roller to a short 2-to-4 foot pole saves your back and lets you roll seamless top-to-bottom strokes without constantly climbing ladders.
- Quality Painter’s Tape: Use specialized painter’s tape (like blue or green multi-surface tape) and run a damp cloth or putty knife over the edge to seal it tight before applying paint.
Step-by-Step Workflow: The Professional Sequence
Order of operations matters during interior painting. Working out of order means risking wet splatters on freshly finished surfaces.
The 4-Step Painting Sequence
- Step 1: Ceilings First: Always paint overhead before the walls. Using flat white ceiling paint catches any accidental drops early, making clean-up effortless. Any minor drips or spatter will fall onto unpainted walls, where they can easily be rolled over later.
- Step 2: Trim, Baseboards, and Casing: Paint door frames, window sills, and baseboards next. Don’t worry if a little trim paint touches the raw drywall—you’ll cover those edges when painting the walls.
- Step 3: Cutting-In the Edges: Once the trim has fully cured (wait at least 12 hours), brush a 2-to-3-inch border of wall paint along corners, ceilings, and trim edges.
- Step 4: Rolling the Wall Fields: Work in 3×3 foot sections, rolling in a continuous “W” pattern before smoothing it out with straight vertical passes. Keep a “wet edge” by moving steadily across the wall to avoid visible lap seams.
Real Homeowner Mistakes & How to Avoid Them
Even seasoned DIY enthusiasts encounter preventable hiccups during interior painting projects. Here are the common pitfalls that hurt the final quality:
| COMMON DIY PAINTING MISTAKES |
[!] Over-working drying paint —> Causes visible texture lap marks |
[!] Removing tape when dry —> Pulls cured paint off the wall |
[!] Skipping dry times —> Causes coat lifting & bubbling |
[!] Unsealed drywall patches —> Causes dull “flashing” spots |
Top 4 DIY Pitfalls
- Over-Working Drying Paint: Going back over paint that has been sitting for 10–15 minutes tears up the forming skin layer, creating textured drag marks and visible lap lines. If you missed a spot, let it dry completely, then touch it up during your second coat.
- Ripping Off Dry Painter’s Tape: Waiting until paint dries completely to peel off your tape risks pulling the newly cured paint film right off the wall. Pull tape away at a smooth 45-degree angle while the second coat is still slightly tacky, or slice along the edge with a sharp utility knife first.
- Rushing Re-Coat Drying Times: Most interior paints feel dry to the touch within 1–2 hours. However, applying a second coat before the underlying layer dries fully traps moisture, leading to long-term softness and bubbling. Wait at least 4 full hours between coats.
- Neglecting Drywall Repair Sealers: Applying finish paint straight over fresh joint compound causes the dry spackle to pull moisture out of the paint, leaving dull patches called “flashing.” Always spot-prime repaired drywall before painting the whole wall.
Pro Maintenance Routine: Keeping Your Walls Fresh
Once you’ve put in the time and effort to execute a professional interior painting project, simple routine maintenance keeps your walls looking fresh for years:
- Handling Touch-Ups: Keep a small glass mason jar filled with leftover paint from your original project. Label it with the room name, paint brand, color code, and sheen level. Use a small foam brush to dabbing lightly over scuffs—feathering the edges outward to blend in with cured wall paint.
- Cleaning Wall Surfaces: Never scrub fresh paint during its first 30 days—it needs time to fully cure and harden. When cleaning scuffs later on, use a soft microfiber cloth with warm water and a small drop of mild dish soap. Avoid aggressive chemical cleaners or abrasive scouring pads.
- Managing High-Touch Zones: Doors, light switches, and hallway corners collect skin oils and dirt over time. Wiping down these focal zones every few months prevents built-up grime from degrading the paint layer.
Final Verdict & Closing Thoughts
Transforming your living space through strategic interior painting comes down to patience, proper prep work, and precise execution. Whether you tackle a weekend accent wall in your office or hire specialists like Coastal Carolina Painters to refresh an entire home layout, taking time to do things right pays off in long-lasting, smooth walls.
Take a methodical approach: inspect your drywall surfaces, select the right sheen for each room’s moisture levels, invest in quality synthetic brushes and microfiber rollers, and never skip your prep work. With the right foundation and materials, a fresh coat of paint will bring out the best in your living space.
Frequently Asked Questions
Q1: What is the true interior painting meaning?
Proper interior painting isn’t just cosmetic—it seals drywall against moisture and instantly elevates your home’s total resale value.
Q2: What drives the average interior painting cost?
Total interior painting pricing varies by wall size and prep work, but handling basic surface scrubbing yourself drastically lowers contractor bills.
Q3: Which interior painting techniques ensure smooth walls?
Coat ceilings first, cut-in edges with sash brushes, and roll walls using continuous overlapping “W” passes for zero lap marks.
Q4: How to discover trend-setting interior painting ideas?
Review real interior house paint colors pictures under daylight to test how shadow undertones match your room’s natural light.
Author By: Dambar C. Rajbanshi About: A renovation strategist and home improvement enthusiast. Dambar specializes in budget-smart planning and functional kitchen design. He is dedicated to helping homeowners create spaces that perfectly balance beauty and practicality