
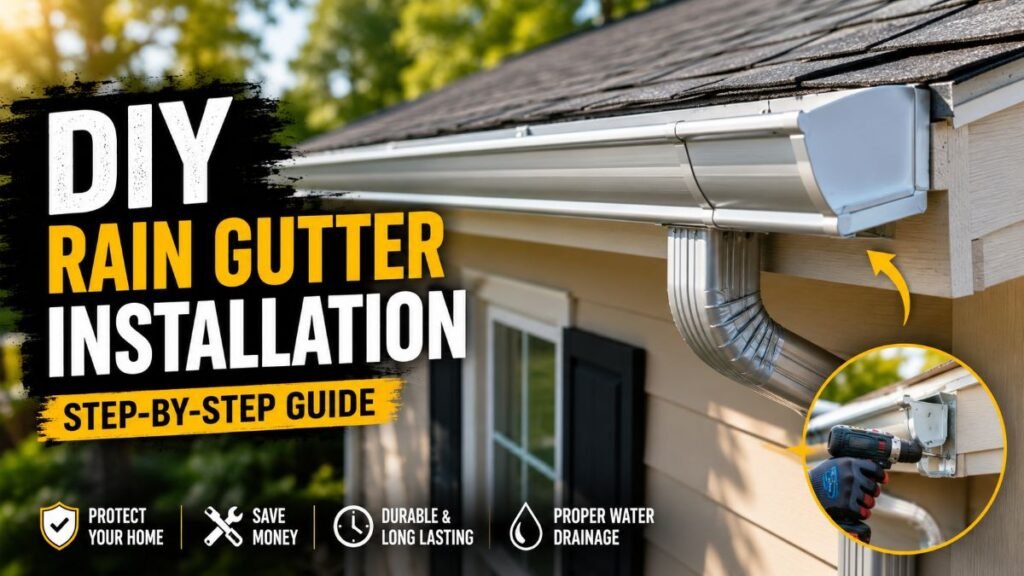
Managing roof runoff is a non-negotiable part of structural home maintenance. During a heavy downpour, a medium-sized residential roof can shed hundreds of gallons of water in a matter of minutes. Without a properly pitched, seamless channel system, that cascading torrent dumps directly along your foundation, erodes surrounding landscaping, and eventually seeps into basements or crawlspaces.
Whether you are replacing sagging channels or executing a fresh rain gutter installation from scratch, getting the slope, spacing, and sealing right is essential for long-term structural protection.
Quick Project Summary: DIY Feasibility Checklist
Before climbing a ladder, evaluate whether this project fits your skill level:
- Project Difficulty: Moderate to High
- Ideal Crew Size: 2 People (especially for handling 10-foot metal lengths)
- Typical Time Required: 6 – 10 hours for a single-story 1,500 sq. ft. home
- Best Conditions: Calm, dry weather (never work on wet roofs or in windy conditions)
- When to Hire a Pro: Multi-story homes, steep-pitch roofs, rotten fascia requiring extensive carpentry, or complex custom miter corners.
Choosing Gutter Materials: Aluminum vs. Galvanized Steel
Selecting the right profile and material depends heavily on your regional weather patterns, budget, and handling capabilities. Below is a side-by-side comparison of the two dominant DIY choices.
Performance Aspect | Aluminum Gutter Systems | Coated Galvanized Steel Systems |
Lifting & Installation Ease | Effortless to hoist; manageable by a single installer on ladder setups. | Substantially heavier; demands two-person handling for balanced alignment. |
Physical Impact Resistance | Fairly resilient, though vulnerable to surface creasing under ladder weight or falling branches. | High structural toughness; tolerates heavy winter snow loads and major storm debris without bending. |
Rust Protection | Natural oxidation prevents rust formation over time. | Relies on zinc plating (preferably G-90 standard) and exterior coatings to stop corrosion. |
Temperature Expansion | Expands considerably during heat waves, requiring flexible seal joints. | Minimal dimension changes during seasonal temperature extremes. |
Overall Budget | Budget-friendly option with readily available retail parts. | Premium investment requiring weather-resistant specialized fasteners. |
Field Recommendation: In heavy snow zones subject to ice dams, galvanized or painted steel provides crucial rigidity. However, for standard residential retrofits, aluminum remains the industry standard for ease of handling. If you are coordinating roof drainage alongside other major exterior improvements, ensure downspout discharge routes clear paths away from high-traffic patio spaces or structural outdoor living zones.

Required Tools, Fasteners, and Safety Gear
Gathering the correct hardware upfront prevents mid-project delays and hazardous ladder trips.
Layout & Measuring Tools: 100-foot tape measure, chalk line, 2-foot spirit level, carpenter’s square, and a fine-tip permanent marker.
Cutting & Shaping Tools: Left and right aviation snips, high-pitch hacksaw, hole saw attachment (matched to outlet flange size), and a power miter saw equipped with a non-ferrous carbide metal blade.
Fasteners & Hardware: Heavy-duty hidden hangers, 3-inch stainless steel lag screws, hex-head sheet metal screws, heavy-duty pop rivets, and pop-rivet gun.
Sealant Technology: High-grade elastomeric or silicone-modified butyl gutter lap sealant (avoid standard acrylic painter’s caulk).
Safety Equipment: Duty-rated Type I or IA extension ladder compliant with OSHA ladder safety standards (29 CFR 1926.1053), ladder stand-off stabilizer, heavy cut-resistant gloves, and eye protection. ⚠️ Safety Note: Always set your extension ladder on firm, level ground adhering to the 4-to-1 ratio rule (1 foot back for every 4 feet of height). Use an approved ladder stabilizer to protect your fascia from crushing, maintain three points of contact at all times, and never overreach beyond the side rails.
Step-by-Step DIY Rain Gutter Installation Process
Installing a rain gutter system requires methodical layout, precise slope calculation, and solid structural anchoring.
Installation Layout & Pitch Flow Map
Layout Stage | Position / Metric | Hardware Anchoring | Primary Function |
High Point | 1.0″–1.5″ below drip edge | Hidden Hangers to Rafter Tails | Prevents water backflow beneath shingles |
Slope Line | 1/4″–1/2″ drop per 10 ft | Snapped Chalk Line on Fascia | Establishes gravity-fed drainage flow |
Mid Anchors | 18″–24″ spacing | 3″ Stainless Lag Screws | Supports dynamic wind & ice loads |
Low Point | Downspout drop location | Outlet Fitting & Elbow Assembly | Funnels runoff cleanly into downspouts |
Step 1: Establish the Slope Line
- Inspect Fascia: Check for rot or water damage and repair soft timber before mounting hardware.
- Set the Pitch: Mark your high point 1.0″ to 1.5″ below the drip edge. Drop the opposite end 1/4″ to 1/2″ for every 10 feet of horizontal run toward your downspout. Snap a bright chalk line between both marks.
Step 2: Anchor Into Rafter Tails
- Locate Framing: Trace your roof’s internal rafter tails behind the fascia (typically 16″ on center).
- Drill Pilot Holes: Drill 3/16″ guide holes straight through the fascia trim into the heart of each rafter tail.
Pro Tip: Coat your 3″ lag screw threads with bar soap to drive them smoothly into hard framing without shearing the heads off.
Step 3: Cut and Join Sections
- Cut to Fit: Trim your metal channels using aviation snips or a power miter saw fitted with a non-ferrous carbide blade.
- Overlap Seams: Overlap connecting channels by 3″ to 6″ in the direction of water flow. Secure the joint with two staggered rows of stainless pop rivets.
Step 4: Fabricate Downspout Outlets
- Mark & Cut: Center the drop outlet fitting over the downspout location, trace the inner rim, and cut out the hole using snips or a matching hole saw.
- Lock Outlet: Snip 1/4″ vertical tabs around the cut rim, fold them downward, insert the outlet fitting from the inside, and fasten it with sheet metal screws.
Step 5: Hang, Seal, and Test
- Mount Hangers: Hook the gutter into hidden hangers spaced 18″ to 24″ on center, snapping the front lip tight.
- Seal Seams: Apply a thick bead of heavy-duty elastomeric lap sealant over all internal seams, end caps, and rivets.
- Water Test: Let the sealant cure for 24 hours before running a hose test to verify smooth drainage.
Downspout Capacity & Sizing Considerations
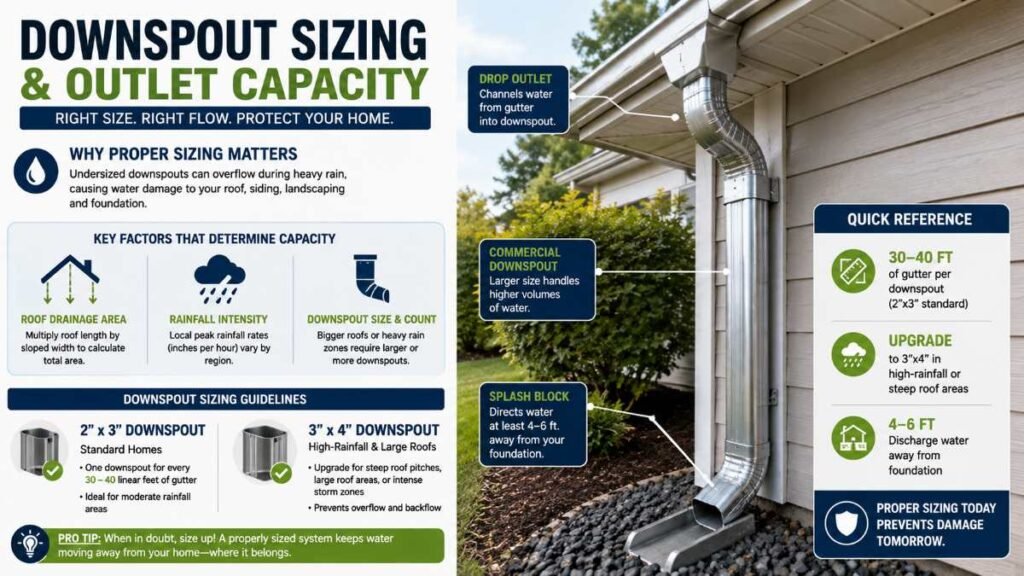
Properly sizing your drainage system prevents backwashing and overflow during severe storm events. Downspout capacity depends on several combined factors:
- Total Roof Drainage Area: Calculated by multiplying roof length by the actual sloped roof width.
- Regional Rainfall Intensity: Local weather data determines maximum peak rainfall rates (inches per hour).
- Downspout Dimensions & Count: A general starting guideline for standard homes is placing one standard downspout for every 30 to 40 linear feet of gutter. However, steep roof pitches, large catchment areas, or regions subject to high-intensity storms often require upgrading from standard channels to commercial downspouts or adding additional drop outlets to avoid capacity bottlenecks.
Integrating Smart Home Gutter Guards and Maintenance
Proper post-installation maintenance protects your structural investment and keeps water flowing freely year-round.
- Seasonal Debris Clearing: Clean out leaves, twigs, and shingle grit twice a year (late spring and late autumn).
- Hardware Tightening: Check hidden hanger lag screws annually; thermal movement can gradually back fasteners out of fascia boards.
- Downspout Discharge Distance: Direct downspout extensions at least 4 to 6 feet away from foundation walls. For challenging soil profiles, integrate subterranean solid PVC piping or consider professional groundskeeping methods like those covered in our guide on lawn care habits.
Smart Maintenance Sensors: Modern home automation extends to exterior water management. Installing smart rain sensors or freeze-monitoring heat cables along gutters allows you to automate ice-dam prevention via your central hub—similar to the principles outlined in our overview of smart home automation. Connecting your drainage monitoring to a main hub like Google Home Mini provides real-time alerts when temperature drops create ice risks along roof edges.
Final Verification Checklist
Before wrapping up your rain gutter installation, complete this final quality review:
- [ ] Slope verified (approx. 1/4″–1/2″ per 10 feet, or per system manufacturer specs) toward all downspout drop outlets.
- [ ] Hidden hangers fastened through fascia directly into structural rafter tails every 18–24 inches.
- [ ] All section seams overlapped per manufacturer specifications in the direction of water flow and fastened with two staggered rows of pop rivets.
- [ ] Seams, drop outlets, and end caps generously sealed from the inside using elastomeric sealant.
- [ ] Downspout extensions installed to discharge water at least 4 to 6 feet clear of the foundation.
Foundation Protection:
A proper rain gutter installation is your home’s first line of defense against foundation rot and costly structural water damage. Whether you use lightweight aluminum or rugged galvanized steel, getting the slope right, anchoring into rafter tails, and sealing every seam with high-grade elastomeric sealant keeps heavy roof runoff safely away from your home. Keep up with quick bi-annual clear-outs and basic hardware checks to guarantee high-performance drainage and bulletproof foundation safety for decades.

Frequently Asked Questions
Q1: What are common rain gutter installation mistakes?
Improper slope, incorrect hanger spacing, and bad seam sealing are major errors. Skipping rafter tail anchoring can cause sagging during heavy storms.
Q2: What are common rain gutter problems?
Frequent issues include standing water, leaking joints, clogged downspouts, and overflowing water that damages foundation walls.
Q3: What is the correct rain gutter installation method?
A proper rain gutter installation requires setting a 1/4″ pitch per 10 feet, securing hangers into rafter tails, and sealing all joints with elastomeric sealant.
Q4: How to fix incorrect gutter slope?
Unfasten the hidden hangers, recalculate the drainage slope with a chalk line, and re-anchor the rain gutter installation at the correct angle.
Author By: Dambar C. Rajbanshi About: A renovation strategist and home improvement enthusiast. Dambar specializes in budget-smart planning and functional kitchen design. He is dedicated to helping homeowners create spaces that perfectly balance beauty and practicality