
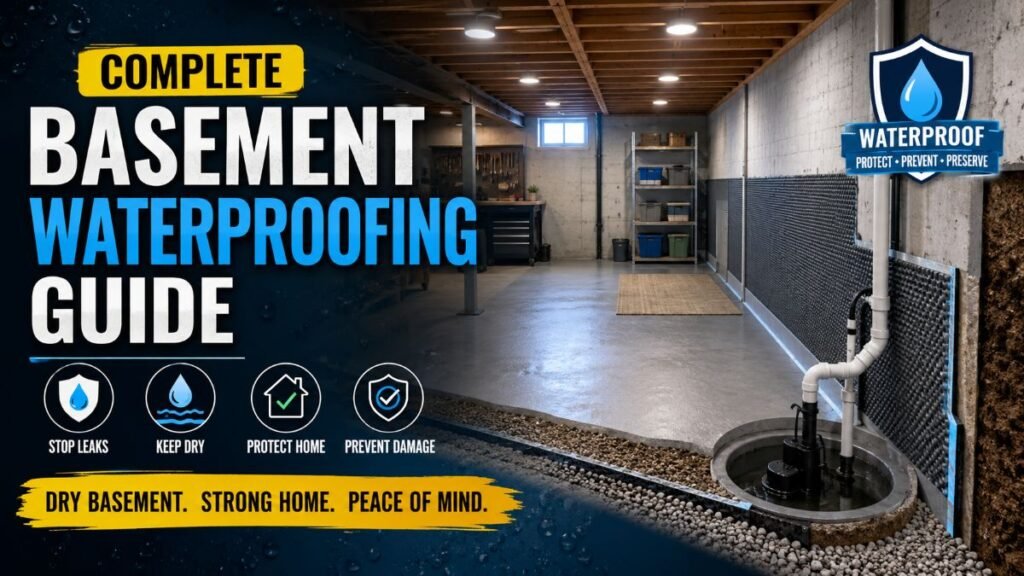
Waking up after a downpour to a damp subterranean smell or an active corner puddle will sink any homeowner’s stomach. Water intrusion doesn’t just ruin stored belongings; it quietly destroys structural framing and eats away at property equity. Slapping waterproof paint over damp concrete only buys time, not safety. Real basement waterproofing requires a strategic line of defense tailored to your soil, water table, and foundation setup.
Here is what actually works to lock out moisture for good.
What Should I Do First?
If you spot active water or dampness creeping into your basement, run through this step-by-step diagnostic sequence before reaching for your wallet or signing off on expensive contractor quotes:
Inspection Step | Target Area | Recommended Action | Key Benchmark |
Step 1 | Gutters & Downspouts | Clear debris and add pipe extensions to redirect roof runoff. | Discharge water at least 6 to 10 feet away from foundation walls. |
Step 2 | Exterior Yard Grade | Fill low spots and slope topsoil away from the perimeter. | Maintain a drop of at least 6 inches over the first 10 feet. |
Step 3 | Specific Leak Paths | Trace water trails using a flashlight during active storms. | Identify if seepage stems from wall cracks, floor joints, or window sills. |
Step 4 | Window Wells & Covers | Clear leaves out of well beds and fit tight protective covers. | Keep well drain free-flowing to prevent water pooling against glass. |
Step 5 | Sump Pump & Float Switch | Pour a 5-gallon bucket of water directly into the sump basin. | Confirm the float switch trips instantly and the discharge pipe runs clear. |
Inspection Step 6 | Target Area | Recommended Action | Key Benchmark |
Understanding the Root Causes of Subterranean Water Intrusion
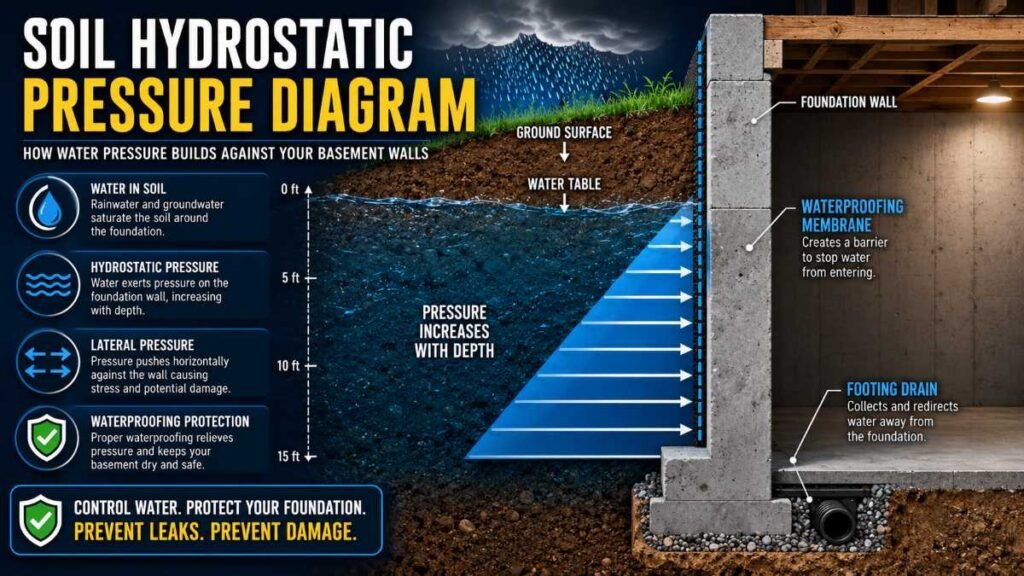
Before spending thousands on contractor fixes, you need to know exactly how water forces its way inside. Concrete looks solid, but under hydrostatic pressure, it behaves like a rigid sponge.
- Hydrostatic Pressure: When heavy rain or rapid snowmelt saturates the soil surrounding your home, standing groundwater generates continuous lateral force. According to hydrogeological publications from the USGS Publications Warehouse on Groundwater, groundwater exerts a natural pressure of approximately 0.43 psi per foot of water depth. That pressure forces moisture inward through microscopic concrete pores, vertical settlement cracks, and the cold joint (where your floor slab meets the footing).
- Surface Grading Deficiencies: If your yard slopes toward the house rather than away from it, roof runoff accumulates directly against the foundation, creating localized saturation zones.
- High Water Tables: In low-lying regions or during seasonal high tides, subterranean water rises beneath your home, pushing upward against the slab via capillary action.
Fixing water problems starts from the top down. If your roof runoff spills over clogged gutters right onto your flowerbeds, no basement system can keep up. Check out our detailed rain gutter installation guide to resolve roofline runoff before it ever hits the soil.
Exterior Waterproofing vs. Interior Drainage Systems
Contractors usually pitch two primary methods for long-term water control: stopping moisture on the outside or channeling it safely away on the inside.
System Strategy | Core Mechanism | Ideal Use Case | Disruption & Labor | Relative Investment |
Exterior Waterproofing | Excavation, elastomeric membrane, exterior drain tile | Heavy hydrostatic pressure; full structural foundation sealing | Severe (excavates perimeter to footings) | $$$$ |
Interior Drainage | Sub-floor perforated channel, sump basin, wall vapor barrier | Managing groundwater seepage below slab level in existing homes | Moderate (jackhammering interior slab perimeter) | $$$ |
Crack Injection | High-pressure epoxy or polyurethane expansion resin | Targeted structural leak repairs on poured concrete walls | Minimal (drill-and-inject isolated points) | $$ |
Masonry Coatings | Elastomeric paint, hydraulic cement | Light vapor dampness on bare concrete block walls | DIY-friendly (apply with brush/trowel) | $ |
Practical Note: While exterior excavation provides comprehensive defense by keeping water away from the concrete entirely, interior sub-floor drainage paired with a heavy-duty sump pump is usually the most cost-effective and realistic choice for established homes where landscaping, decks, or concrete driveways make full exterior excavation impractical.
Step-by-Step Interior Sub-Floor Drainage and Sump Pump Installation
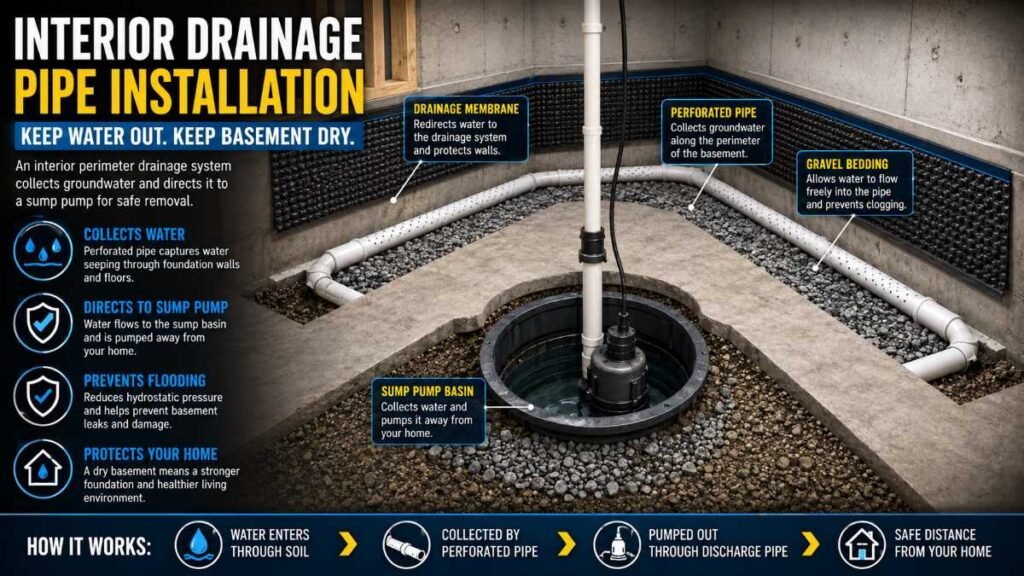
If water routinely seeps up through floor cracks or the cove joint during major storms, installing an interior perimeter drain is the industry standard approach.
- Perimeter Trenching: Technicians break out a 12- to 18-inch section of the concrete slab along the interior foundation walls to access the top of the footing.
- Laying the Collector Pipe: A perforated PVC pipe wrapped in geotextile filter fabric is laid into a washed-gravel bed inside the trench to intercept groundwater before it reaches floor level.
- Routing to the Sump Pit: The piping slopes downward toward a heavy-duty, sealed sump basin dug into the lowest section of the basement floor.
- Slab Restoration: The trench is backfilled with stone and topped with fresh concrete, leaving a narrow wall-gap or drain channel to catch potential wall leaks.
Step | Action | Practical Purpose |
Step 1 | Perimeter Trenching | Exposes underlying footings to collect groundwater |
Step 2 | Laying Collector Pipe | Intercepts sub-slab water via perforated geotextile pipe |
Step 3 | Routing to Sump Pit | Directs incoming seepage downward via gravity flow |
Step 4 | Slab Restoration | Reseals floor while preserving perimeter drainage paths |
When managing heavy moisture in subterranean spaces, keep an eye out for concurrent plumbing issues. A sudden spike in water volume might stem from broken supply lines under the slab. Review our steps on handling an emergency plumbing repair if you notice unexpected water pressure issues during your waterproofing project.
Exterior Membranes and Proper Yard Grading
Stopping water outside keeps concrete dry and prevents structural freeze-thaw damage. Achieving true exterior basement waterproofing involves specific surface and subterranean steps:
- Asphalt-Modified Membranes: Excavated concrete walls are cleaned and coated with flexible polymer-modified asphalt or heavy rubber sheets that expand and contract without tearing.
- Dimple Drainage Boards: Plastic dimple mats are attached over the membrane to create an air gap, letting water drop quickly to the footing drains without pressing against the wall.
- Positive Slope Grading: Building standards detailed in the U.S. Department of Energy Moisture Control Guidance specify that ground surrounding your foundation should slope downward at least 6 inches within the first 10 feet.
Maintaining proper slope requires keeping your outdoor spaces healthy and stable. Integrating seasonal lawn care habits prevents soil erosion around your foundation perimeter, ensuring water flows away smoothly during heavy rains.
Fixing Foundation Cracks, Window Wells, and Wall Seepage
Not every basement requires thousands of dollars in trenching. Isolated seepage can often be corrected with targeted fixes:
- Polyurethane Injection: Poured concrete foundation walls often develop vertical shrinkage cracks. Flexible polyurethane foam is injected through the full thickness of the wall, expanding upon contact with moisture to seal pathways while accommodating minor foundation movement.
- Epoxy Structural Bonding: If a crack shows structural displacement or active load stress, high-strength structural epoxy is injected to weld the concrete back together.
- Window Well Drainage: Deep basement window wells act as collection buckets during microburst storms. Install clear polycarbonate well covers and ensure the well drain connects directly into your sub-floor drainage network.
If you plan to finish your basement after tackling water issues, combine your layout choices with smart moisture management. Our guide on bathroom remodeling provides practical tips for moisture-heavy subterranean spaces, while installing non-porous bathroom storage cabinet units prevents mildew from taking hold on stored items.
Sump Pump Selection, Power Redundancy, and Smart Alerts
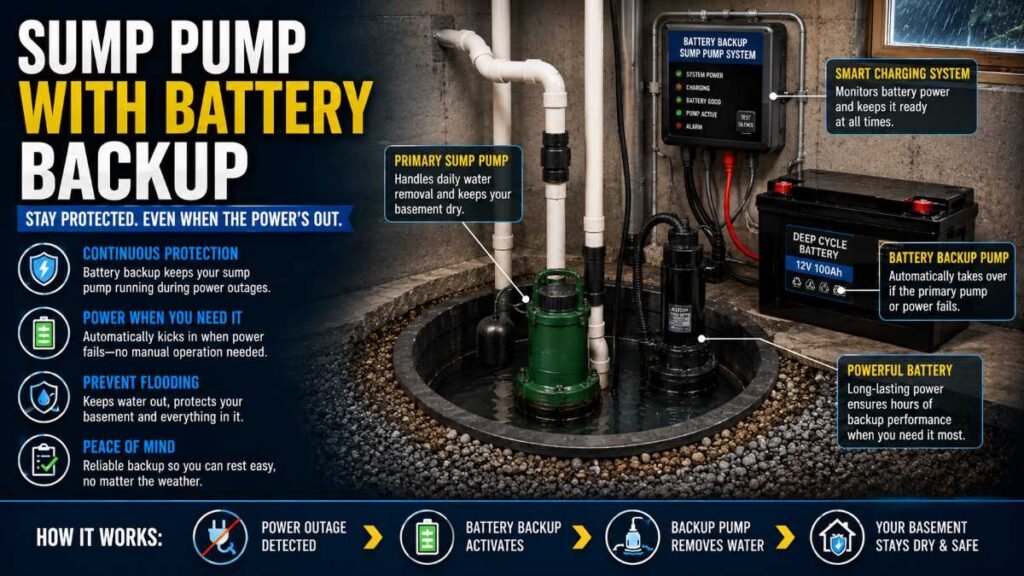
An interior basement waterproofing system relies entirely on its sump pump. When a severe storm hits and local power goes out, an unprotected pump will leave your basement vulnerable within minutes.
- Primary Submersible Pump: Pick a heavy-duty cast-iron pump rated at 1/3 to 1/2 horsepower. Cast-iron housings dissipate motor heat far better than plastic models during extended pumping runs.
- Dual-Battery Backups: Install a secondary DC-powered backup pump alongside your primary AC unit. A marine-grade battery backup system can pump thousands of gallons during extended power outages.
- Smart Water Alarms: Equipping your sump pit with Wi-Fi-enabled high-water sensors sends instant alerts to your phone if water rises past normal operating levels.
Power outages often coincide with severe weather, bringing electrical surges that can damage electronic pump controls. Protect your mechanical switches by installing a whole house surge protector. You can also bundle your leak detectors into wider home safety monitoring using the best smart home devices to receive remote water alerts wherever you are.
DIY vs. Professional Waterproofing Decision Matrix
Diagnostic Scenario | Recommended Solution Pathway | Primary Labor Requirement | Operational Risk Level |
Eaves & Roof Runoff Intrusion | Clean gutters; extend exterior splash blocks. | Self-executed DIY task | Low Risk: High reward with minimal financial outlay. |
Perimeter Soil Saturation | Regrade topsoil to channel rainwater outward. | Self-executed DIY landscaping | Low Risk: Solves surface pooling before water reaches foundation level. |
Vertical Surface Shrinkage Cracks | Inject expanding polyurethane compound into wall. | DIY kit or local specialized repair | Medium Risk: Fails if underlying structural movement continues. |
Continuous Cove Joint Seepage | Install perforated sub-floor pipe & sump pump. | Specialized waterproofing crew | High Risk: Involves concrete breaking and electrical pump setup. |
Block Wall Deflection / Bowing | Wall stabilization with carbon fiber or steel beams. | Licensed foundation engineer | Critical Risk: High structural concern requiring professional design. |
Outer Wall Encapsulation | Complete perimeter digging, membrane & dimple board. | Heavy equipment contractor team | Critical Risk: Extreme disruption requiring professional excavation safety. |
When to Call a Professional Immediately (Red Flag Checklist)
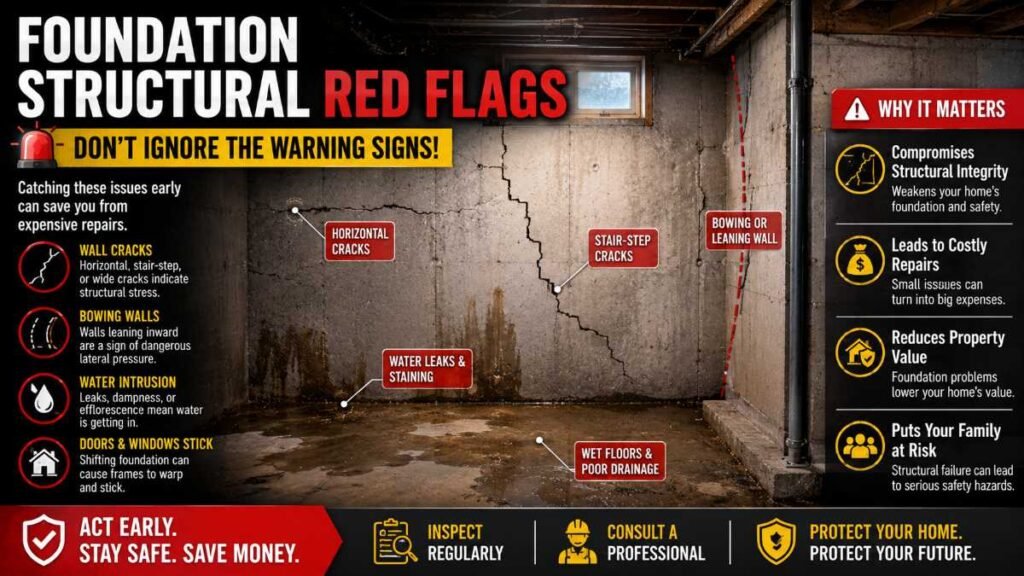
Inspect your foundation regularly and call a qualified geotechnical or waterproofing specialist if you notice any of these structural warning signs:
- 🚨 Horizontal Cracks: Horizontal or stair-step cracking along concrete block mortar lines indicating lateral soil pressure.
- 🚨 Bowing Foundation Walls: Inward bowing or deflection exceeding 1/2 inch along any section of the wall.
- 🚨 Heaving Concrete Slab: Significant floor slab cracking or upward displacement caused by severe hydrostatic uplift.
- 🚨 Continuous Water Inflow: Active, continuous streams of water entering near electrical panels or utility service entries.
- 🚨 Widespread Mold Growth: Extensive fungal growth covering structural floor joists or wall studs.
Cost Breakdown, Resale Impact, and Hiring Contractors
Investing in basement waterproofing helps protect home resale value by addressing persistent moisture and foundation-related concerns. Typical market ranges across average U.S. regions include:
Service Scope | Estimated Market Range | Structural & Financial Benefit |
Interior Drainage & Sump Basin | $4,500 – $11,000 | Keeps finished floor space dry without disrupting yard landscaping |
Exterior Excavation & Wall Membrane | $9,000 – $22,000 | Stops moisture before it touches concrete; eliminates exterior pressure |
Polyurethane Crack Injection (Per Crack) | $350 – $800 | Cost-effective fix for isolated shrinkage leaks in poured concrete |
Sump Pump Replacement + Battery Backup | $700 – $2,200 | Crucial safety net against power outages during severe summer storms |
Contractor Note: Actual costs vary significantly by location, property access, foundation depth, and job severity. Always obtain at least three written estimates from licensed contractors who perform thorough site evaluations before signing a contract.
Managing Humidity, Preventing Mold, and Improving Indoor Air Quality
Eliminating standing water is only half the battle. High ambient humidity levels can quietly rot wooden floor joists, harbor dust mites, and trigger mold growth.
- Mold & Spore Mitigation: To stop fungal growth on subterranean framing, official U.S. EPA Mold Guidelines recommend maintaining indoor relative humidity strictly below 50%.
- Dedicated Basement Dehumidification: Basements stay cool year-round. When warm, humid summer air enters through vents, it hits cold concrete walls and condenses. Running a heavy-duty, Energy Star-rated dehumidifier with a direct gravity drain line keeps moisture in check.
- Heavy Vapor Retarders: Wall-mounted 12-mil polyethylene vapor barriers direct minor wall moisture down into your sub-floor drainage channel, keeping moisture away from finished wall studs.
Controlling humidity turns a musty cellar into a healthy, usable living space or valuable storage area.
Conclusion
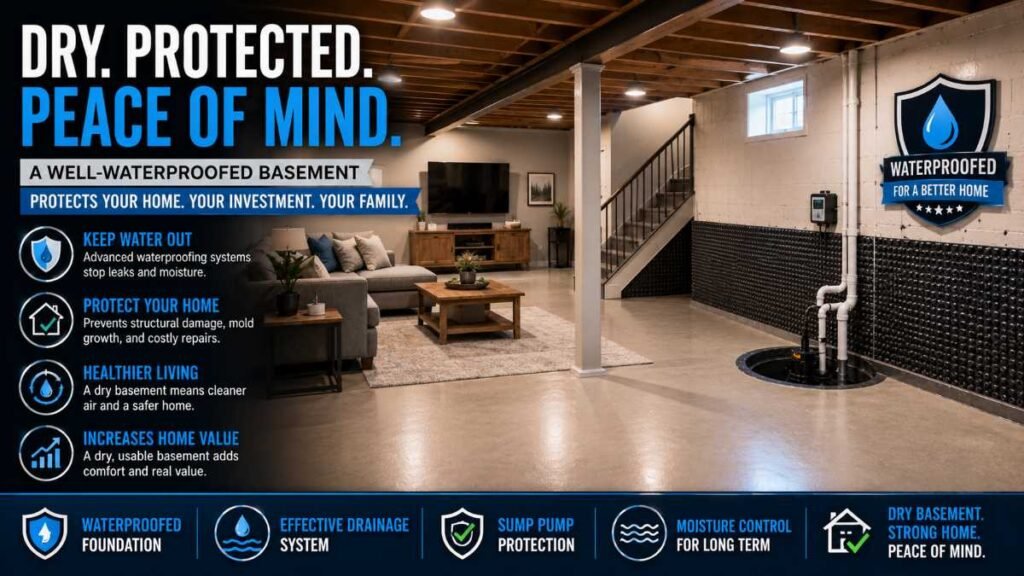
Taking a practical, step-by-step approach to basement waterproofing protects your home from foundation damage and keeps your indoor air clean. Whether you adjust yard slopes, repair wall cracks, or install a sub-floor drainage system with battery backup, addressing water issues promptly ensures your home remains dry, safe, and valuable for years to come.
Frequently Asked Questions
Q1: How to 100% waterproof a basement? Combine exterior membranes, proper yard slope, and sub-floor drainage with a battery-backed sump pump. Real basement waterproofing requires this complete inner and outer defense.
Q2: How do I get 2 inches of water out of my basement? Cut power first for safety. Extract pools using a submersible pump or shop vac, then run heavy dehumidifiers to dry walls.
Q3: How long can water sit in a basement? Mold grows within 24 to 48 hours. Standing water rapidly ruins framing and indoor air quality if not pumped out instantly.
Q4: How do I tell if my basement is waterproof? Watch for white salt stains (efflorescence), damp seams, or musty smells. Dry walls year-round signal successful basement waterproofing.
Author By: Dambar C. Rajbanshi About: A renovation strategist and home improvement enthusiast. Dambar specializes in budget-smart planning and functional kitchen design. He is dedicated to helping homeowners create spaces that perfectly balance beauty and practicality