

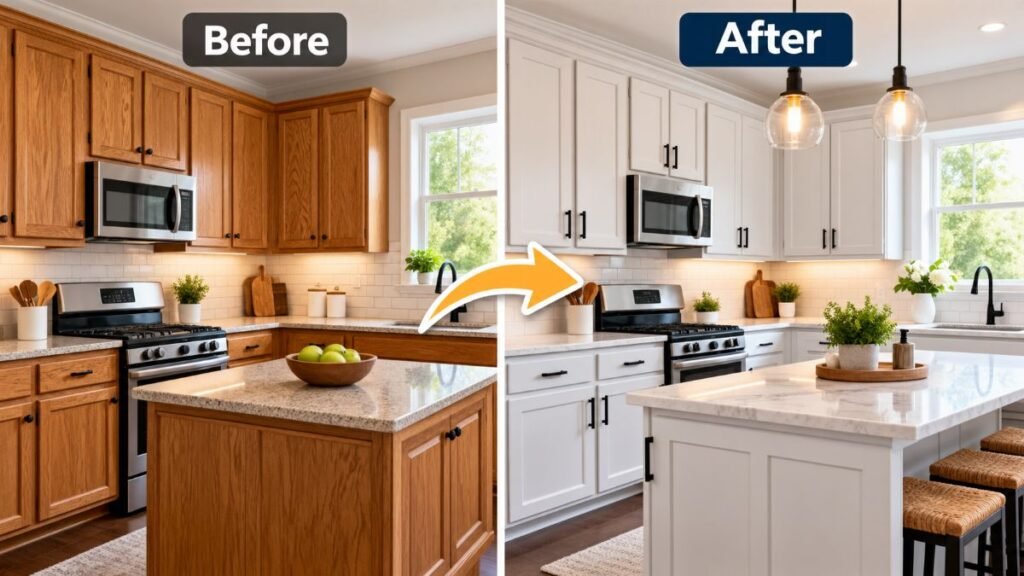
Are worn, discolored cabinets making your kitchen feel dated, but replacing them sounds financially painful? You can achieve a stunning transformation for $200–$400 in materials without tearing out a single wall. If your cabinet boxes are structurally solid, learning how to paint kitchen cabinets gives you a smooth, durable finish that lasts for years. Skip the costly contractors and avoid amateur mistakes with this practical, battle-tested refinishing roadmap.
Overview
Metric | Details |
Average Cost | $200 – $400 (Covers enamel paint, bonding primer, cleaner, abrasives, and basic PPE)* |
Time Needed | 4 to 7 Days (Varies by cabinet door count, workspace setup, and curing windows) |
Skill Level | Intermediate (Requires systematic surface preparation, proper tools, and patience) |
Primary Supplies | Heavy-duty degreaser (TSP substitute), 220-grit sandpaper, bonding primer, cabinet enamel |
*Note: Material costs vary based on total square footage, substrate porosity, paint brand selection, and existing tool inventory.
Substrate Inspection
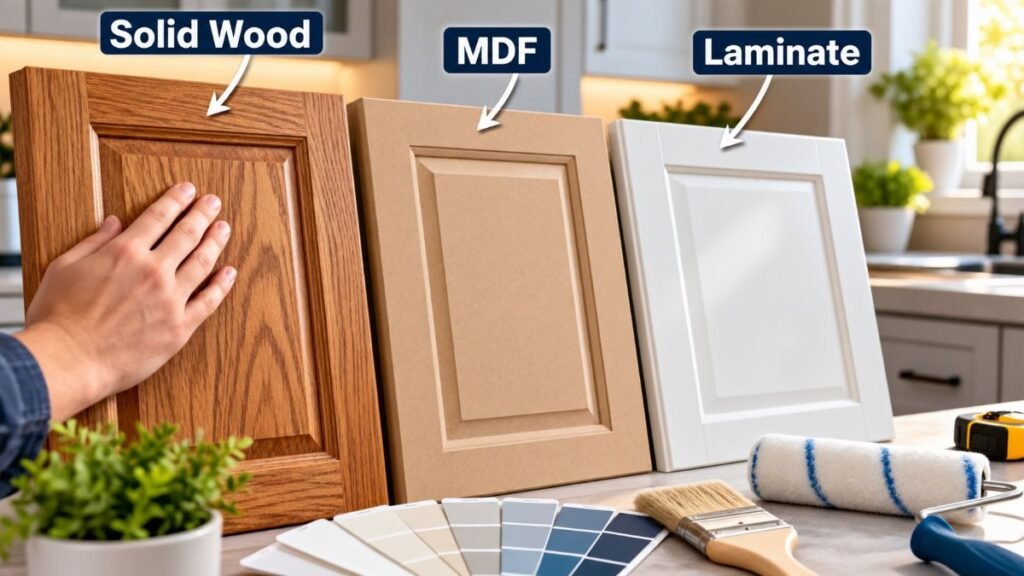
Before purchasing paint, inspect your existing cabinet materials. Core substrates require specific preparation steps to ensure long-term coating adhesion.
Substrate Material | Paintable? | Surface Prep Strategy |
Solid Hardwood | Yes | Sand thoroughly; use a stain-blocking shellac or oil primer to seal grain and tannins. |
Wood Veneer | Yes | Lightly scuff-sand with 220-grit sandpaper to avoid burning through the thin veneer layer. |
MDF / Particle Board | Yes | Seal raw exposed edges; use a solvent-based primer to prevent board swelling. |
High-Pressure Laminate | Conditional | Requires specialized ultra-high adhesion bonding primer designed for non-porous surfaces. |
Thermofoil / Vinyl Wrap | No (Generally) | Peeling or bubbled vinyl wraps must be completely stripped before any coating is applied. |
Structural Red Flags
Painting provides an aesthetic upgrade, but it cannot repair compromised core materials. Do not paint over these structural defects:
- Severe Water Damage or Swelling: Particleboard or MDF that has expanded due to moisture loses internal structural integrity and will not hold hardware or fasteners securely.
- Loose Thermofoil Layering: Coating straight over peeling or bubbled vinyl wrapping causes the underlying bond to snap, making your new paint crack and lift within months.
- Cabinet Box Instability: Structural frame failure or loose joints require carpentry repair or total unit replacement.
- Active Rot or Mold: Organic decay must be fully remediated and replaced before applying primers or paints.
Tools & Safety Checklist
Using the right equipment prevents finish defects while protecting your indoor air quality during sanding and chemical handling.
- Cleaning Solutions: Heavy-duty TSP substitute to strip grease and cooking oils.
- Personal Protection: Safety glasses, nitrile gloves, and an N95 dust mask. When spraying solvent-based primers indoors, use a respirator fitted with organic vapor cartridges as recommended in the OSHA Respiratory Protection Standards.
- Abrasives & Fillers: 120-grit and 220-grit sandpaper, plus high-grade wood filler for gouges and dents.
- Applicator Tools: 2-inch synthetic angle sash brushes, high-density foam mini-rollers, or an airless paint sprayer.
- Dust Control: Microfiber cloths and tack cloths for final surface dust removal.
Step-by-Step Preparation Protocol
Skipping prep work is the primary cause of cabinet paint peeling around handles and stove areas. Kitchen surfaces collect invisible grease that blocks paint bonding.
- Disassemble Hardware: Remove all doors, drawer fronts, and hardware hinges. Store screws in organized, labeled zip-top bags.
- Label Every Piece: Mark each door inside its hinge pocket using painter’s tape (e.g., U-01 for Upper Door 1). Marking inside the hinge cup keeps labels safe from sandpaper and paint.
- Eliminate Surface Grease: Cut through accumulated grease and surface oils using an effective degreasing solution, rinsing with fresh water so no film interferes with primer adhesion.
- Repair Gouges: Fill scratches with premium wood filler and allow it to dry completely according to label instructions.
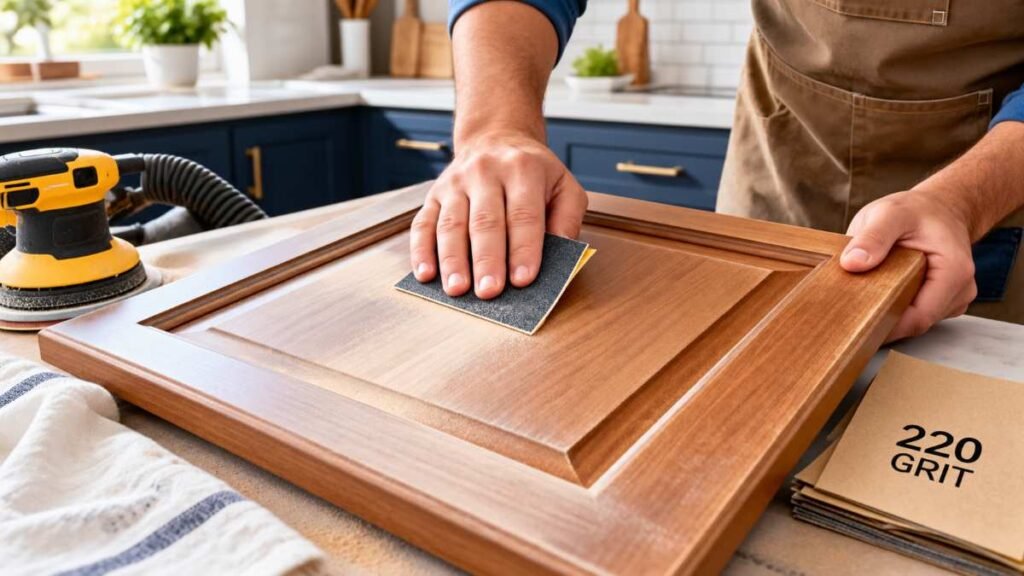
- Scuff-Sand Surfaces: Sand all surfaces with 220-grit sandpaper to break the existing sheen and create a mechanical “tooth” for primer adhesion.
- Eliminate Dust: Vacuum the entire workspace, then wipe down every panel using a tack cloth.
Practical Setup Tip: Lay out elevated 2×4 boards or painter’s pyramids in a low-traffic room to raise doors off the floor. This allows clean edge painting without sticking to drop cloths during extended drying periods.
If you are planning layout upgrades or minor carpentry before painting, explore our guide on small kitchen island ideas and avoid costly mistakes by reviewing common kitchen remodeling mistakes.
Primer & Topcoat Selection
Standard interior wall paint stays soft, making it prone to scuffing on high-touch cabinet surfaces. Cabinets require hard-curing primers and specialized enamels.
Primer Type | Target Application | Key Performance Benefit |
Shellac-Based | Oak, Pine, Raw Wood Knots | Blocks tannin bleed-through, sap knots, and persistent odors. |
Oil-Based | Bare Wood & MDF | Seals porous wood fibers without swelling surface board materials. |
High-Adhesion Bonding | Laminate, Slick Enamels | Forms a durable bond on smooth, non-porous surfaces. |
Waterborne Acrylic | Previously Painted Wood | Fast drying time with lower VOC emissions. |
Preventing Tannin Bleed
Wood tannins in woods like oak or pine can migrate through water-based paint films as yellowish stains. Apply an appropriate stain-blocking primer to lock these natural resins in place before topcoating.
Paint Selection: Waterborne Alkyds
Modern waterborne alkyd enamels deliver the hardness and self-leveling qualities of oil-based paints with easy water cleanup. Select a Satin or Semi-Gloss finish for high scrubbability. For indoor air quality best practices during home painting, refer to the EPA Indoor Air Quality Guide.
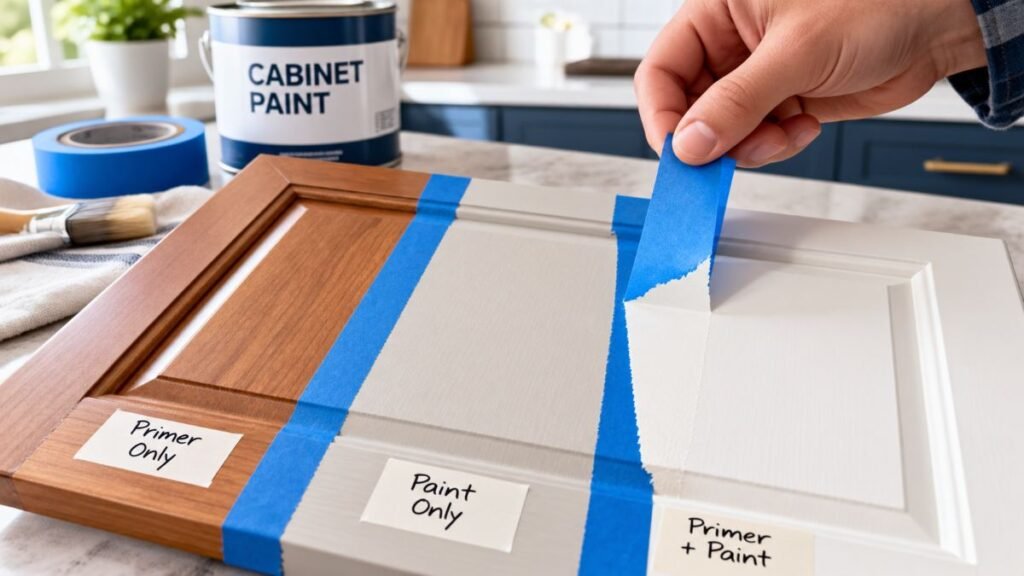
Adhesion Test
Avoid widespread paint failure by testing your primer and paint combination on a concealed area first.
- Clean, degrease, and scuff-sand a small test area on the back of a cabinet door.
- Apply one coat of primer and one coat of topcoat, following product dry times.
- Allow the paint to cure for 48 hours in a well-ventilated room.
- Press painter’s tape firmly over the finish and pull it away quickly. If paint lifts off, clean the surface again or switch to a higher-adhesion bonding primer.
Application Techniques
Selecting the right application method depends on your tools, workspace setup, and comfort level.
Brush and Roller Method
- Paint recessed panel grooves first using a 2-inch synthetic angle brush.
- Immediately roll flat panel areas using a high-density foam mini-roller while the brushed edges remain wet.
- Avoid over-working drying paint; quality waterborne alkyd enamels self-level naturally as they cure.
Airless Sprayer Method
- Strain paint through a fine mesh filter before loading spray reservoirs.
- Maintain a spray distance of 10–12 inches, keeping the gun perpendicular to panels with consistent 50% overlapping passes.
- Note: Spraying uses more material than rolling due to transfer loss and overspray.
Inspection Checkpoint: After your primer coat dries, hold a flashlight at a low angle across the doors. Side-lighting reveals subtle surface scratches or missed spots that need additional filler and light sanding before applying final topcoats.
For a broader look at surface preparation methods across other areas of your home, check our overview of interior painting methods.
What I Would Do Before Painting an Older Kitchen
Having worked on numerous home updates, here are three practical steps I always take before painting older cabinets:
- Replace Old Hinges First: Old soft-close hinges or worn hardware can misalign newly painted doors, causing them to rub against cabinet frames and scratch fresh paint.
- Test One Complete Door First: Rather than prepping all 20 doors at once, take one small door through degreasing, priming, and painting. This confirms your product compatibility and drying time before scaling up.
- Keep Extra Touch-Up Paint in a Jar: Save a small glass jar of topcoat enamel for quick brush touch-ups down the road when heavy cookware inevitably causes a minor edge nick.
Estimating Paint Quantities
Required paint volume depends on door dimensions, substrate porosity, coat counts, and application methods.
Rather than relying on generic estimates, calculate surface coverage using the square-foot coverage rate listed on your paint label, adhering to guidelines supported by the USDA Forest Products Laboratory. Account for both sides of every door, drawer fronts, face frames, and exposed end panels. A typical 10×10 kitchen with 18–22 doors generally requires 1 gallon of primer and 1 to 2 gallons of cabinet enamel for two full coats.
Drying vs. Curing
Understanding dry time versus cure time prevents premature damage to your new finish:
- Dry Time (1–4 Hours): Solvents evaporate, making the surface dry to the touch so additional coats can be applied.
- Cure Time (7–30 Days): Paint resins cross-link fully into a hardened film capable of handling daily wear.
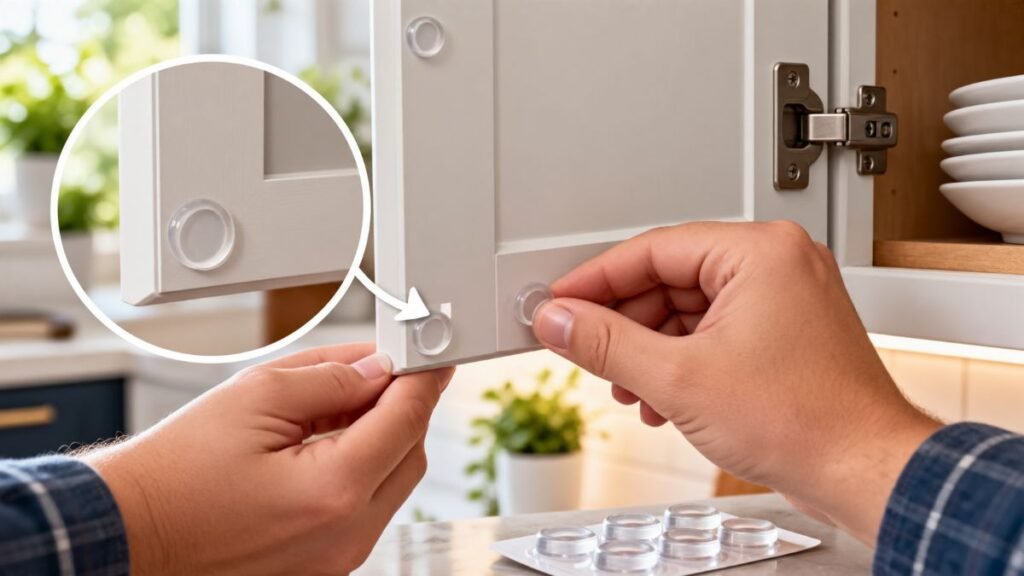
To prevent blocking—where newly painted doors stick to cabinet frames and peel away—wait at least 48 hours before rehanging doors. Attach clear silicone bumper pads to inner door corners prior to daily use.
Troubleshooting Common Issues
Defect | Root Cause | Practical Solution |
Peeling / Poor Adhesion | Grease contamination or no scuff-sanding | Strip affected area back, clean with degreaser, and re-prime. |
Visible Brush Marks | Overworking paint after it began setting | Lightly sand flat with 220-grit sandpaper; apply a thin second coat. |
Orange Peel Texture | Thick coat or excessive roller stipple | Sand smooth; switch to a high-density micro-foam roller. |
Runs and Drips | Too much paint applied per coat | Allow to dry completely, scrape drip flat with a razor, sand, and touch up. |
Tacky Surface | High humidity or heavy coat thickness | Increase room airflow and temperature; extend dry time. |
Tannin Bleed | Resins migrating through water primer | Spot-prime with shellac stain-blocker and recoat. |
If you are updating other areas of your home alongside your kitchen cabinets, explore our guides on kitchen flooring options or review luxury vinyl flooring installation
Frequently Asked Questions
1. How long does it take for beginners to paint cabinets?
It takes 4 to 7 days for beginners learning how to paint kitchen cabinets, allowing adequate time for sanding, priming, and curing.
2. Can you paint cabinets without sanding or removing doors?
No. Skipping scuff-sanding or leaving doors attached leads to uneven paint drips and early peeling near high-touch areas.
3. What is the average cabinet painting cost in the USA?
Pro painting costs $1,500–$4,000, but learning how to paint kitchen cabinets yourself cuts total material costs to just $200–$400.
4. How do professionals get a smooth finish on cabinets?
Pros use heavy degreasing, 220-grit sanding, stain-blocking primer, and durable waterborne alkyd enamel applied with high-density foam rollers.
5. How long must painted cabinets cure before daily use?
Paint dries in hours, but full curing takes 7 to 30 days. Rehang doors carefully and add silicone bumper pads.
Take Action on Your Kitchen Transformation
Ready to upgrade your kitchen without a costly full renovation? Grab your safety gear, catalog your cabinet hardware, run a quick adhesion test on a hidden panel, and stick to a structured prep routine. Learning how to paint kitchen cabinets gives you a fresh, factory-grade look while keeping thousands of dollars in your pocket!
External Resources & Standards
USDA Forest Products Laboratory Guide – Wood finishing properties, coating adhesion, and substrate characteristics.
EPA Indoor Air Quality Guidance – VOC emissions safety and indoor ventilation standards during interior painting.
OSHA Respiratory Protection Standards – Personal protective equipment (PPE) requirements for spraying and handling paint solvents.
Editorial Disclaimer
This technical guide is intended for educational and informational purposes. Always review product Safety Data Sheets (SDS) and specific manufacturer directions for paints, primers, and degreasers. Ensure adequate ventilation and proper personal protective equipment (PPE) during sanding and chemical application. Dispose of chemical waste according to local municipal guidelines.
About the Author
Dambar C.P. Rajbanshi is a home improvement researcher and writer focusing on DIY surface preparation, coating selection, and practical residential maintenance workflows. He specializes in breaking down complex home updates into actionable, step-by-step guides for homeowners.