
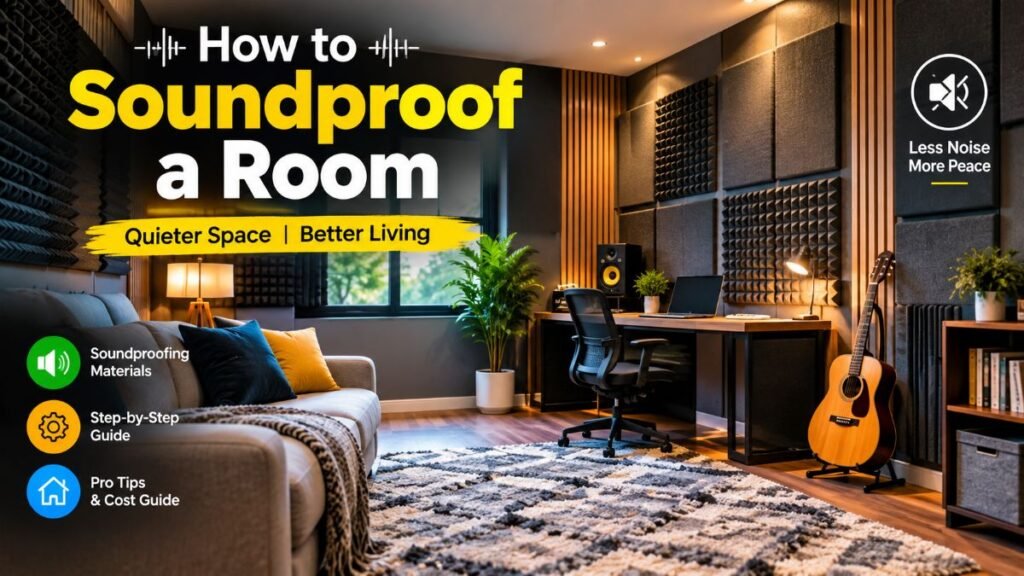
Traffic noise keeping you awake, or constant echoes ruining your remote work calls? Sound leakage is a frustrating daily headache, but achieving absolute peace at home doesn’t require an engineering degree.
Whether you’re battling a neighbor’s barking dog or heavy upstairs footsteps, learning how to soundproof a room comes down to smart isolation, adding real mass, and sealing hidden air paths. Here is a practical DIY guide to reclaiming your quiet sanctuary.
Airborne Noise vs. Impact Noise: Identify the Issue First
Before spending a single dollar on materials, you need to identify the specific type of noise disrupting your space. Using the wrong fix for a specific problem will waste both your time and budget.
Noise Category | Transmission Path | Common Examples | Primary Solution Required |
Airborne Noise | Travels directly through the air | Traffic, sirens, voices, TV audio, barking dogs | Blocking Mass (High Density & Damping) |
Impact Noise | Travels through building structure | Footsteps on hardwood, dropped items, door slams, washer vibrations | Decoupling & Mechanical Isolation |
- Airborne Noise: Travels directly through the air. Common examples include street traffic, loud conversations, and TV audio. If your primary goal is to soundproof a room against traffic, you need high-density materials that add mass to walls and seal off air leaks.
- Impact Noise (Structure-Borne): Occurs when physical contact transfers vibrations directly through the building structure—like heavy footsteps or vibrating appliances. Addressing impact noise requires structural isolation, mechanical decoupling (such as resilient channels), or high-density underlayment pads to absorb kinetic energy before it travels through framing.
First-Hand Field Observation: In real-world retrofits, almost 70% of homeowner complaints about “thin walls” are actually caused by unsealed flanking paths and hollow doors rather than missing insulation inside the wall frame.
Seal Air Gaps First (The "Acoustic Flanking" Rule)
Sound waves behave like water; they pass through tiny air gaps easily. Even small unsealed gaps around doors, windows, and electrical outlets create “flanking paths” that drastically reduce your wall’s acoustic insulation performance.
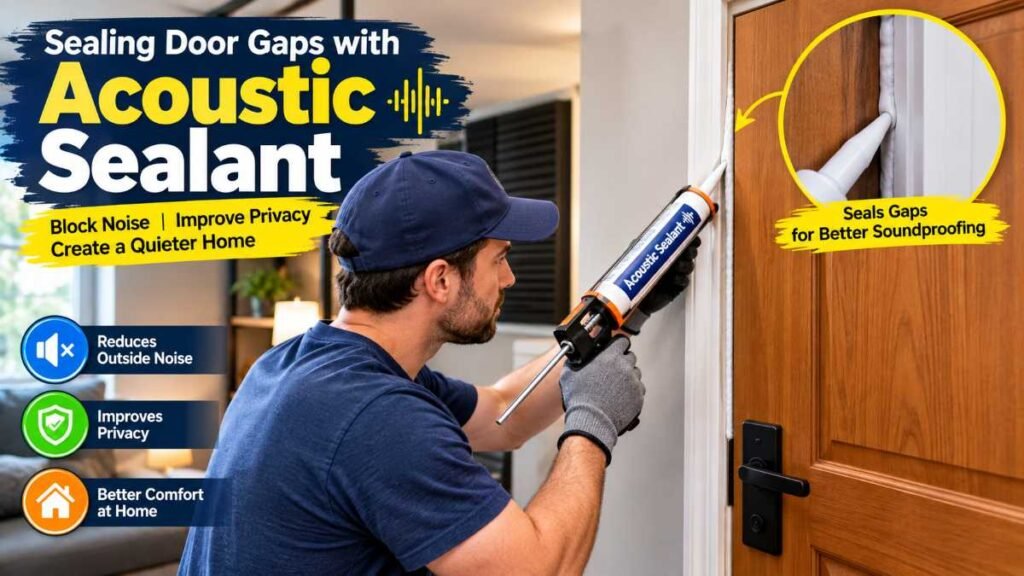
- Doors and Windows: Standard interior doors are often hollow-core, acting like amplifiers. Replacing hollow doors with solid-core wood doors makes a major difference. For existing setups, install heavy-duty neoprene weatherstripping around the perimeter, add an adjustable sweep to close the bottom floor gap, and use heavy curtains over glass.
- Outlets & Baseboards: Electrical boxes create direct openings in drywall. Remove faceplates and seal gaps between the drywall and junction box using non-hardening acoustical sealant or pre-cut putty pads. Apply sealant along baseboards where drywall meets the subfloor.
First-Hand Field Observation: If light passes through a crack under your door or around a window frame, sound is passing through at almost full intensity. Sealing a 1/4-inch gap under an interior door can reduce incoming speech noise by up to 50% without altering the wall structure.
DIY Project Implementation & Budget Matrix
Not all products labeled for acoustics perform the same function. Choosing the right approach depends on your specific noise source, room layout, and available budget.
Strategy / Project Approach | Primary Function | Difficulty Level | Approx. Budget |
Door Gap Sealing & Weatherstripping | Seals perimeter air leaks around entry points | Easy (DIY) | Low ($15–$40) |
Acoustic Window Inserts & Curtains | Suppresses window glass vibration and leaks | Easy (DIY) | Low–Medium ($50–$200) |
Area Rugs + High-Density Rubber Pads | Dampens footstep impact noise on hard floors | Easy (DIY) | Low–Medium ($80–$300) |
Double Drywall + Damping Compound | Adds heavy mass & converts sound to heat | Moderate (DIY/Pro) | Medium–High ($300–$800) |
Decoupled Wall with Resilient Channels | Mechanically isolates framing from drywall | Advanced (Pro Required) | High ($1,000+) |
Wall Treatments: Decoupling and Adding Mass
If you have thin walls and can hear conversations from the next room, standard drywall alone won’t suffice. To effectively soundproof a room sharing a thin wall, apply the principles of mass, damping, and mechanical separation.
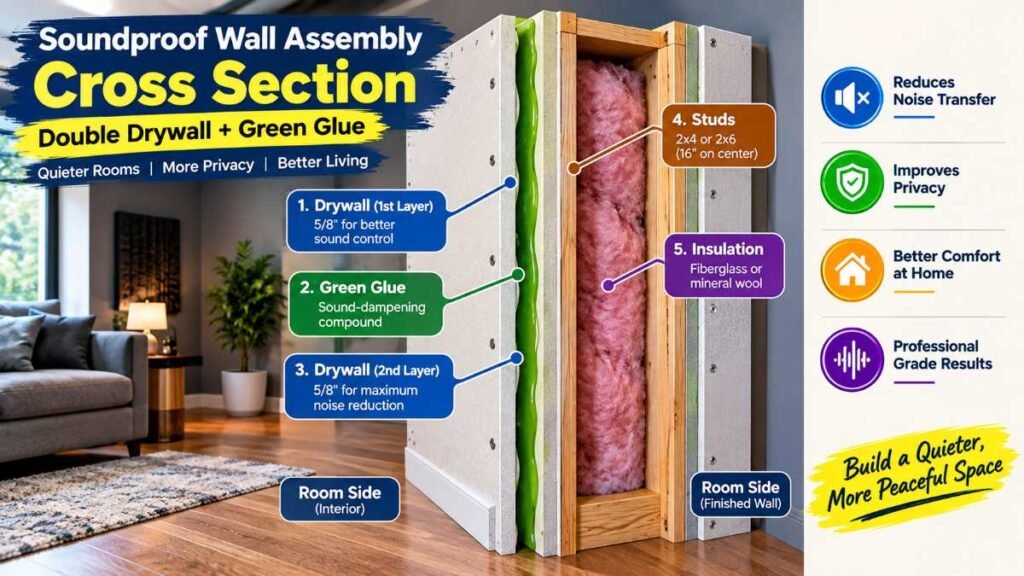
Wall Layer | Recommended Material | Primary Function |
Stud Cavity Space | Acoustic Mineral Wool Insulation | Absorbs airborne sound waves inside wall cavities |
Layer 1 (Base Panel) | 5/8-inch Type X Drywall | Provides heavy base structural mass |
Layer 2 (Damping Layer) | Viscoelastic Damping Compound (e.g., Green Glue) | Dissipates acoustic energy into friction heat |
Layer 3 (Finish Panel) | Second Sheet 5/8-inch Drywall | Traps damped energy and seals the wall assembly |
Step 1: Insulate Cavities
If you are opening up drywall during a renovation, fill cavity spaces with dense mineral wool or specialized sound-batt insulation. While cavity insulation absorbs mid-to-high frequencies, remember that the entire assembly determines final Sound Transmission Class (STC) ratings.
Step 2: Add Mass Loaded Vinyl (MLV)
Staple a layer of 1 lb/sq ft Mass Loaded Vinyl directly to wall studs or over existing drywall. MLV provides heavy mass without taking up much physical depth.
Step 3: Double Drywall with Damping Compound
The most practical DIY method for existing walls is adding a second sheet of 5/8-inch drywall. Before securing the second sheet, apply a viscoelastic damping compound between the panels. This compound converts sound energy into slight heat, lowering overall sound transmission across the wall assembly.
If you are setting up a quiet remote workspace alongside these wall upgrades, explore practical home office setup ideas to organize your layout efficiently.
Flooring Fixes: Stopping Impact Noise from Above and Below
Footstep noise and floor vibrations require specialized underlayments to break structural contact between hard surfaces.
- Underlayment Upgrades: If you plan to install hardwood or luxury vinyl plank, put down a dedicated acoustic underlayment underneath. High-density rubber or cork pads cushion footfall impacts significantly. For more details on choosing durable, noise-dampening materials, check out our luxury vinyl flooring guide.
- Carpet Pads and Rugs: The simplest non-construction fix is placing thick wool area rugs with heavy rubber rug pads over hard surfaces.
- Subfloor Damping: For upstairs rooms, securing loose subfloor panels firmly to joists with construction adhesive and screws eliminates squeaks and structural creaks.
First-Hand Field Observation: When dealing with heavy footstep noise from above, adding acoustic foam or panels to your ceiling will do almost nothing. Structural vibration must be stopped at the floor surface above or decoupled using ceiling resilient isolation clips.
Windows and Ceilings: Tackling Weak Points
Ceilings and windows are often the main avenues through which sound enters or escapes.
Ceiling Solutions
Addressing impact noise from an upstairs space requires mechanical isolation. The most effective approach involves attaching resilient isolation clips and metal channels directly to ceiling joists, then hanging 5/8-inch drywall from the channels. This decouples the ceiling drywall from the floor above.
Window Solutions
Single-pane glass allows sound waves to pass through easily. If a full replacement isn’t feasible:
- Window Inserts: Install custom acrylic inserts that seal inside your existing window frame. This creates a dead-air space that can noticeably reduce incoming traffic noise.
- Acoustic Drapery: Hang thick, multi-layered acoustic curtains over the window frame, extending them at least 6 inches past the edges on all sides.
If you are upgrading window frames to boost energy efficiency while reducing outside noise, read our overview of energy efficient windows.
Sound Absorption vs. Sound Blocking: Controlling Room Echo
Once you block outside noise from entering, you must manage the acoustic reflection generated inside the space. Without absorption materials, speech and audio will bounce off hard surfaces, creating unwanted echo.
- Acoustic Panels: Mount fabric-wrapped fiberglass panels at primary reflection points (eye/ear level on side walls).
- Bass Traps: Low-frequency sounds tend to gather in room corners. Placing dense triangular bass traps in wall corners helps balance low-end audio reflections.
- Soft Furnishings: Bookcases filled with books of varying depths act as natural diffusers. Soft sofas, fabric hangings, and thick carpets absorb high-frequency echoes.
Pros and Cons of Room Soundproofing
Pros | Cons |
Better Focus & Sleep: Minimizes street noise, neighbor activity, and domestic distractions. | Space Reduction: Multi-layer drywall and isolation channels can reduce interior room dimensions by 1 to 3 inches per wall. |
Added Value: Upgraded acoustic insulation makes home offices and bedrooms more functional. | Higher Material Costs: Specialized materials like Mass Loaded Vinyl and solid-core doors cost more than standard drywall. |
Increased Privacy: Prevents private conversations or audio playback from leaking outside the room. | Requires Precision: A single unsealed gap or uninsulated outlet box can lower the acoustic performance of the whole wall. |

Frequently Asked Questions
Q1. Do egg cartons or foam panels block outside noise?
Answer: No. Acoustic foam only absorbs echo. To soundproof a room from traffic or neighbors, you need dense materials like mineral wool and Mass Loaded Vinyl.
Q2. What is the cheapest way to soundproof a room wall?
Answer: Seal air gaps around doors and outlets first. Then, add a second drywall layer with Green Glue to soundproof a room wall on a low budget.
Q3. How do I stop footstep noise coming from upstairs?
Answer: Put thick rugs with heavy rubber pads on the upper floor, or mechanically decouple your ceiling drywall using resilient isolation channels.
Q4. Can you completely soundproof a room in a standard home?
Answer: 100% silence needs engineered floating rooms, but proper sealing, mass, and decoupling easily soundproof a room to block 70% to 90% of everyday noise.
Q5. What is the single biggest mistake DIYers make?
Answer: Sticking cheap foam squares expecting total silence! Foam controls echo—it leaks sound through unsealed gaps. Seal air leaks first before attempting to soundproof a room.
Practical Recommendations
When planning your project, prioritize sealing air leaks and adding structural mass before investing in decorative interior panels:
- Quick / Low Budget: Seal perimeter gaps around doors and windows with weatherstripping, acoustical sealant, and heavy sweeps. Combine this with thick area rugs and strategic furniture placement.
- Moderate Budget: Swap hollow interior doors for solid-core alternatives, and add a second layer of 5/8-inch drywall with Green Glue over your shared wall.
- High Performance / Home Studio: Strip walls down to framing studs, install acoustic mineral wool insulation, decouple the drywall using resilient isolation channels, and seal all junction boxes with acoustic putty pads.
For detailed technical standards on Sound Transmission Class (STC) and Impact Insulation Class (IIC) metrics, consult authoritative resources such as the U.S. Department of Housing and Urban Development Sound Control Guide, technical manuals from the National Research Council Canada, or workplace acoustic safety guidelines from OSHA Guidelines.
Looking for additional home improvement and setup guides? Explore our home ideas library at Smart Home Zenith.

Safety & Building Code Disclaimer
The advice provided in this guide is for informational and educational purposes. Before modifying electrical outlets, cutting into drywall, or altering load-bearing ceiling framing, always check your local municipality building codes. Electrical, structural, or gas line work should always be handled by a licensed professional contractor when required by code or when you are uncertain about existing structural framing.
Author Profile
Dambar C. Rajbanshi is a home improvement enthusiast and acoustic optimization consultant dedicated to helping homeowners create quieter, more functional living spaces through practical DIY methods.